Web development in Webmium 3.0
1. Template selection, registration and login
1.1 Selecting a template
1.2 Registration
2. Login
2.2. Slide a section under the menu (special function only for some templates)2.1 Adding a section
2.2. Slide a section under the menu (special function only for some templates)
2.3. Adding content to a section
2.3.1 Text pagelet
2.3.2 Image pagelet
2.3.3. Gallery pagelet
2.3.4. Download file pagelet
2.3.5. Contact form pagelet
2.3.6. Google Maps pagelet
2.3.7. Youtube video pagelet
2.3.8. Html pagelet
2.3.9.Button pagelet
2.3.10. Columns pagelet
2.3.11.Contact information pagelet
2.3.12. Card pagelet
2.4 Moving or deleting a pagelet
2.5. Logo
2.6 Adding another page of the site
2.7. SEO settings
2.8. Publishing the site
3. Admin
3.1. My account
3.2. Subscriptions
3.3. Site Settings
3.4. Language settings
3.5 Domain Management
3.6 Contact form messages
3.7 Account settings and password changes
1. Template selection, registration and login
1.1. Template selection
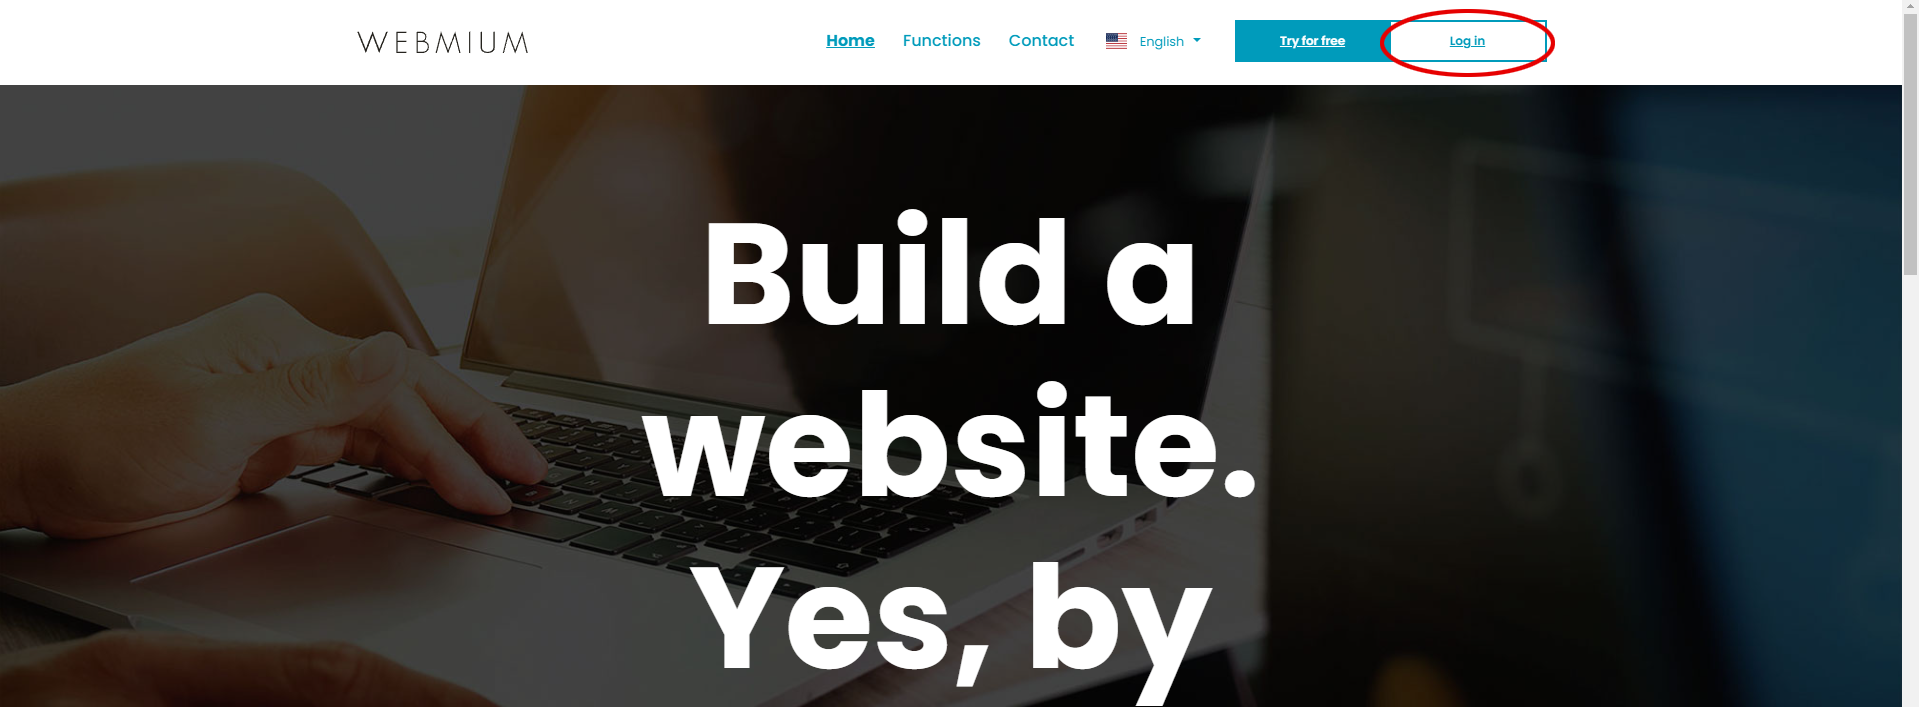
Creating a website in the Webmium editor starts with selecting a suitable template. The template overview/selection can be accessed from the homepage of https://www.webmium.com/ by clicking on the "Try it for free" button.
TIP: Choose a template based on the type and appearance of the menu, the location of the logo and menu items (for example, if you want a menu on the homepage of the site placed directly on the main image and aligned to the center, the "Carpenter", "Hairdresser" or "Wedding Photographer" template is suitable). WE RECOMMEND that you look at the preview of the template on the homepage, on other pages of the site and also on the mobile view to get an idea of how the menu behaves. |
ATTENTION: The template cannot be changed afterwards. If you end up working in one template and decide to use another, you must create a new working website. |
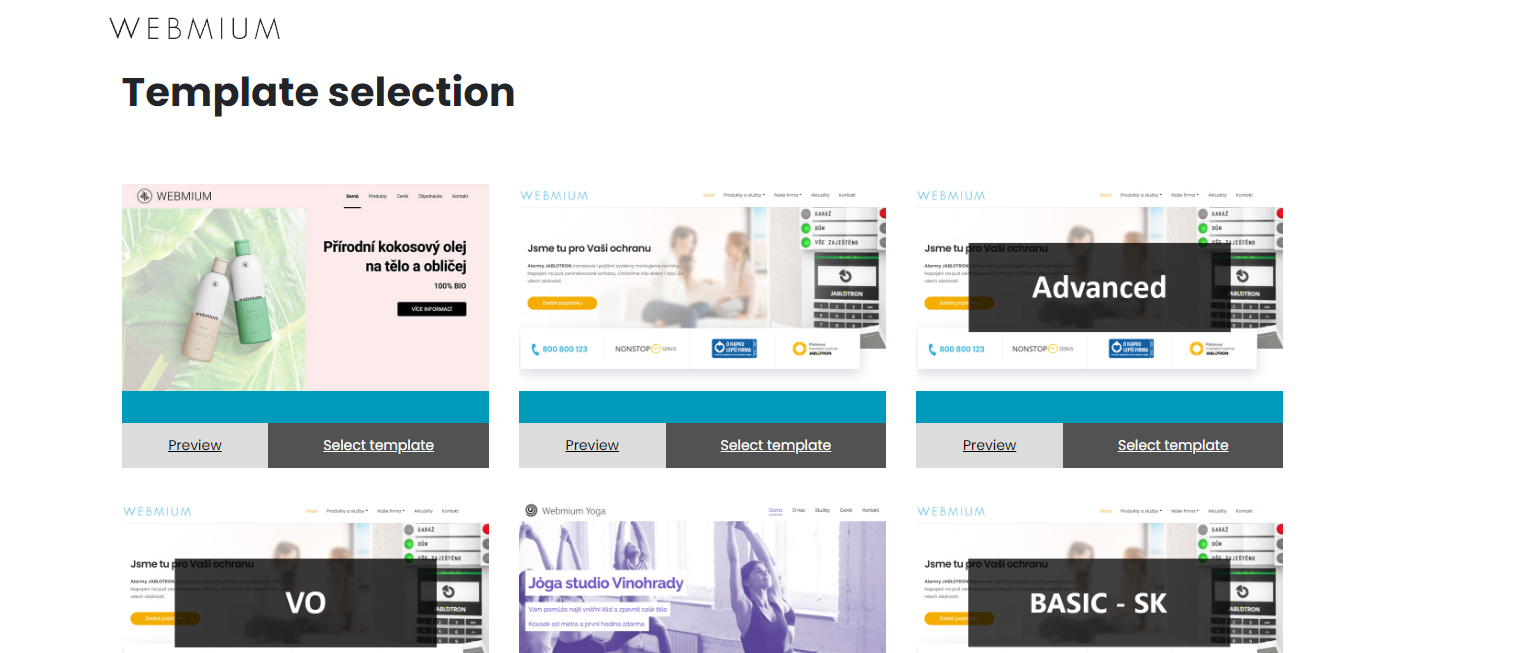
Any template or its sample website can be viewed in detail by pressing the "Preview" button. Once we have selected the template, we put "Select template".
1.2. Registration
Before the system sets up the site, we are asked to register:
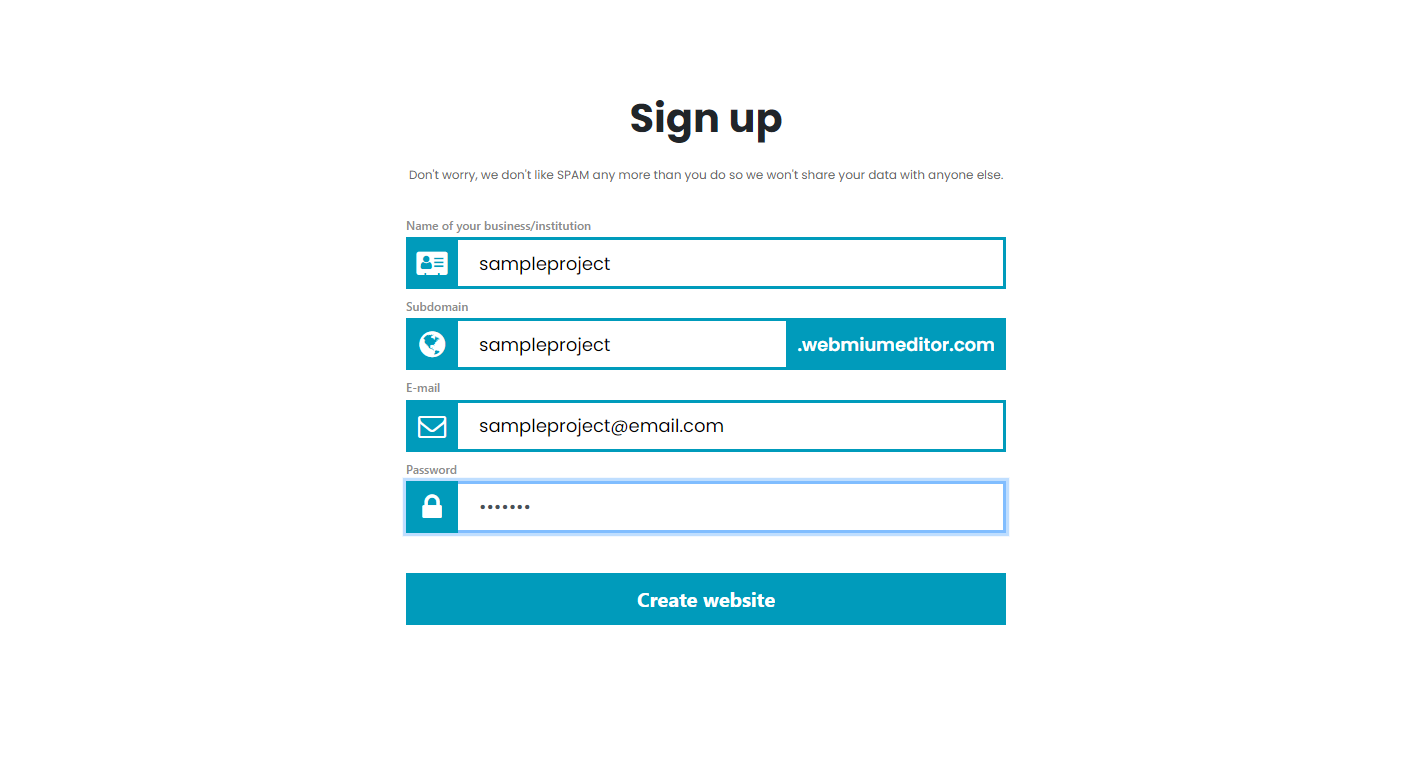
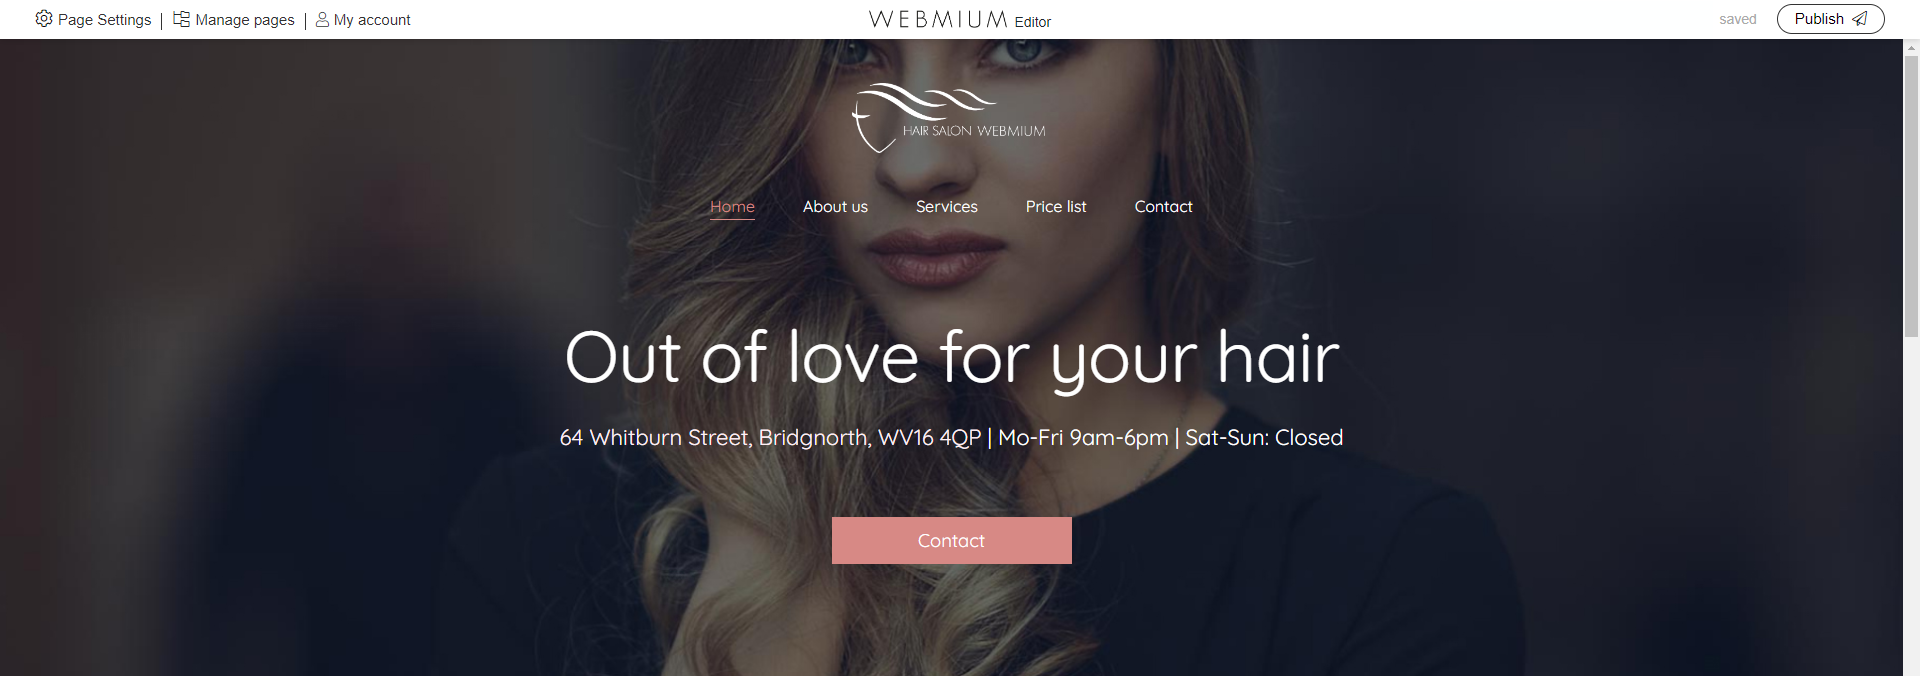
After registration, the website is based on our chosen template in the same form and with the same content as we could see in the "website preview".
We get to the editing interface of the site:
1.3. Login
Subsequent logins to your site editor are again made via webmium.com. Click on the "Login" button on the top right.